
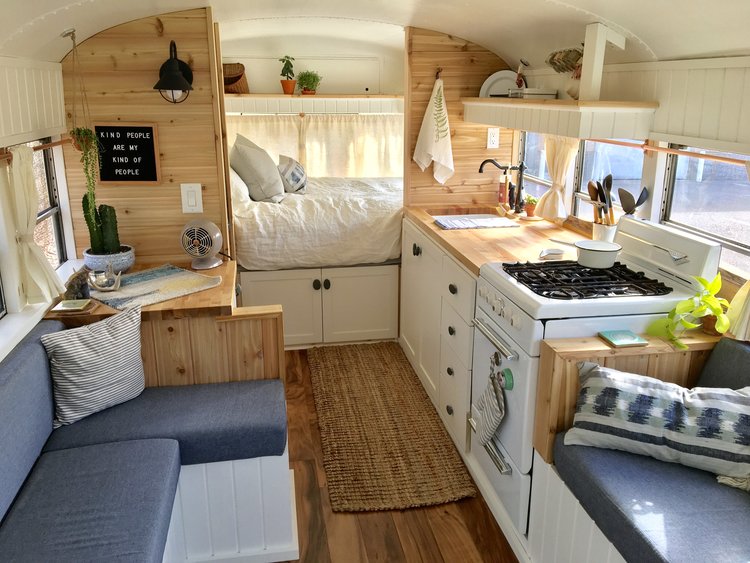
Headline image by Fern the Bus

Harboring dreams of living in a skoolie aka a retired school bus? Maybe you’re already a van-dweller and want to step up to something bigger, better, and more suited to full-time living? Fancy being mortgage-free and traveling the world? Or maybe you just want something fun for the holidays and more imaginative than your standard RV?
The advantage of a school bus conversion is that these vehicles are designed to be super safe and solid. After all, they’re for carrying children around—so you can definitely rely on them to protect you and your belongings on the road.
Converting a school bus and turning it into a proper home can be challenging but it’s definitely worth it. Here’s a brief breakdown of what’s involved so you know what you’re in for—as well as some inspiration to keep you motivated along the way 😉
9 steps to converting a school bus
1. Buy a bus
The first step is, of course, to find your bus. There are different sized school buses available. Which one you go for will depend on your needs. How many people will sleep in it? Where do you plan to drive it and what are the roads like? Is it for full-time living or holidays? What’s your budget? Bear in mind that smaller school buses are actually more expensive because they’re less common.
Expect to pay anywhere between $1,000 to $25,000 for a used school bus. Before buying, check out the amount of rust, wear and tear, as well as how many miles it’s done. You’ll also want to check any mechanical problems and how easy they are to fix as well as the tire quality as replacing tires can be very expensive.

To track down a bus, we recommend checking out online auction sites, classified listings, social media, or getting in contact with your local school district.
2. Create a budget
Once you’ve got your bus, the next step is to work out how much you can afford to spend on the conversion. Being really clear about the costs involved will stop you going overboard or encountering nasty surprises at a later date. To give you a rough idea of costs:
- For building materials, expect to pay at least $5,000.
- Electrical costs will depend on your system but could be around $3,500.
- Heating systems can cost around $1,500 depending on what type you choose.
- You’ll pay around $500 for a toilet.
- A fridge could set you back between $500 and $1,500.
3. Remove the stuff you don’t need
Now you can move on to the actual DIY. The first stage is to remove everything inside the bus that you don’t need—or anything that makes it look like a school bus. You also want to strip everything back so you can see any repair work that needs to be done.
You’ll most likely find a bit of rust at this point and will want to remove this before coating the interior with rust-inhibiting paint as well as painting the exterior a color other than yellow.
4. Draw out a floor plan
Sketch out a floor plan on paper and then use masking tape to map it out inside the bus. This will give you an idea of how the layout will work. At the very least, you’ll want a living area, kitchen, storage space, and bedroom. When laying it all out, remember to consider plumbing and electrics.

5. Insulate
The next step is insulation and you have many different options, ranging from XPS foam sheets and ISO insulation panels to expanded polystyrene and fiberglass. In our opinion, spray foam insulation is the best because it’s super moisture-deterrent, environmentally friendly, and also sound-proof. It’s more expensive than other forms of insulation like fiberglass but the energy savings later down the line make it worth it.

6. Add windows
Getting adequate light into the bus is key but you’ll probably find that the original windows are incredibly drafty. We recommend replacing them with polycarbonate. It’s lightweight, offers high clarity, and is even bullet-proof!
You may want to extend the windows too for better views. Shoulder skylights that curve around the roof of the bus are a good option to maximize natural light and you’ll most likely want a vent, too, to deal with condensation. Or get yourself a dehumidifier.
7. Plumbing and electrics
The two main elements of plumbing in a skoolie are a freshwater drinking tank and a grey water tank where your sewage will go. When positioning your tanks, think about balance, keeping them as low as possible for when the bus is moving around.
You’ll also want a water heater. These can be electric, propane, or solar. Check out our guide to tiny house water heaters for more information.
And of course, you’re going to need a toilet. The options are a gravity flush toilet—such as the Domestic 320—a portable toilet—such as the Porta Potti— or a compost toilet.

Our top pick is this compost toilet by Nature’s Head which is easy to install and only needs to be emptied every 6 weeks when two people are using it.
In terms of electrics, the sample principles apply as with a standard van conversion. Calculate how much electricity you’ll require on a daily basis and what size battery you need. The batteries can charge either when you’re driving, with a solar panel system, or from a mains hook up.
8. Kit it out
The appliances you choose for your skoolie will all depend on your needs and budget but there are some things every home needs. These are the essentials—plus our recommendations for the best models:
- Refrigerator – depending on how long you plan to spend on the road, you may want a fairly big fridge. We recommend this one.
- Oven – gas or propane are the best options. The propane-based Camp Chef Outdoor Oven (which doesn’t actually have to be used outdoors) is very popular among vanlifers.
- Cooktop – we recommend an induction cooktop as they’re safer, take no time to cool down, and cook food quicker. This electric induction cooktop is a good option.
- Washing/dryer – being able to wash clothes on the road is a real luxury. Check out this washer-dryer-combo, built specifically for RVs.
For more inspiration, check out our rundown of the 8 best tiny home appliances.
9. Register it as a motorhome
To legally drive your skoolie on the roads, you’ll need to be registered as a motorhome. To do this, the first step is to get insurance, which will require evidence that you plan to convert the bus. After that, organize a vehicle safety inspection and get a ‘certified weight certificate’ for your bus.
Then, if you have all the necessary appliances and conveniences in your bus so it resembles a motorhome (i.e. a cooking facility, fridge, toilet, heating and water system, and electrics), you should have no problem getting registered officially as a motorhome and acquiring your title and license plates.
If you need to get registered before you’ve completed your conversion, you can simply install these things temporarily.
Inspiration: our top 3 school bus conversions
Sam and Carley, aka the Flat Out Travellers, are two nomads whose 26-foot bus, Ol’ George (named after Carley’s bus driver when she was a kid) is a beautiful combination of dark wood and white cabinetry—an open-plan space with heaps of windows so the couple can enjoy views of America as they road-trip around the country.

This bus is home to Maeg and Ben and has been decorated predominantly in white which helps the space to feel open and airy. Splashes of green are a nice touch and the vibe is very bohemian chic—pretty impressive considering this is a former prison bus!

This small school bus is home to Mande and Ben Tucker and one of the most stand-out features is the roof deck with attachments for a hammock. It’s also incredibly bright thanks to the light-colored wood. Plus, we love the mint green exterior.
Creating your skoolie
Transforming an old school bus into a tiny home is not easy—but it’s definitely fun. After all, what could be cooler than taking something that was once used to take kids to school and turning it into a symbol of total freedom?
That said, we’d warn against being totally spontaneous with your skoolie. The key to a successful school bus conversion is planning. Work out your budget, map out your interior, keep a clear list of what needs to be done, and in what order. Then stick to your blueprint and you’ll do just fine 🙂